FlightRadar24 や FlightAware に対して ADS-B のデータ送信をしている Raspberry Pi3 と APRS のデータ受信サーバーで使用している Raspberry Pi3 を Raspberry Pi4 に集約しようと思いました。いわゆる機器更改です。
ADS-B の Raspberry Pi3 は 2017年夏ごろ稼働開始して OS の Raspbean のリリースは Raspbian GNU/Linux 8 (jessie) で、 APRS 受信の Raspberry Pi3 の Raspbean のリリース は Raspbian GNU/Linux 9 (stretch) です。どちらも、年数が経過しているのと、OS更新するより新規で入れ直しがいいかなと思ったのが理由です。
raspberry pi OS Lite のインストール
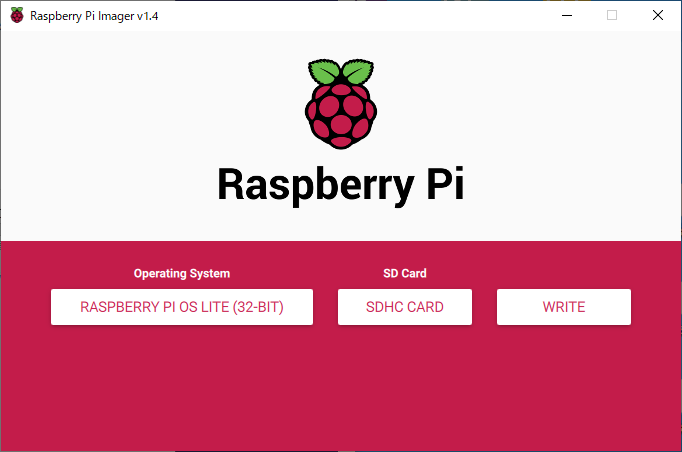
新品の MicrpSD カードと、Raspberry Pi Imager で最新の Raspberry Pi OS イメージを書き込みます。GUI は不要なので、Raspberry PI OS Lite を書き込みます。
書き込み終了後、MicroSD の boot に以下2つのファイルを作成します。
・ssh
・wpa_supplicant.conf
ssh は中身のないファイルです。エクスプローラーから右クリックで新規作成→テキスト ドキュメントをしてすると「新しいテキスト ドキュメント.txt」ができます。これをファイル名の変更で ssh にしたら OK です。
wpa_supplicant.conf は以下のような内容です。改行コードは LF です。SSID は無線LANの SSID、暗号化キーは無線LAN の暗号化キーです。
ctrl_interface=DIR=/var/run/wpa_supplicant GROUP=netdev
update_config=1
country=JP
network={
        ssid="SSID"
        psk="暗号化キー"
}
この 2 つのファイルがあれば、Raspberry Pi に入れてブート後、無線LAN から ssh でログイン可能となります。raspberrypi.local のアドレスに接続して、ユーザー名 pi パスワード raspberry でログインできれば成功。
ここからは、一般的なラズパイの初期設定になりますが省略します。
・raspi-config でSDカードの領域を広げる設定
・raspi-config でタイムゾーン設定
・raspi-config でホスト名設定
・/etc/dhcpcd.conf でスタティックIPの設定(必要であれば)
などです。ホスト名を変更したら ssh 接続するホスト名も変わるので接続時注意です。
パッケージ情報の更新
$ sudo su
# apt-get update
# apt-get upgrade
# reboot

ファイルシステムの容量をSDカード全部使うようにする
$ sudo su
# raspi-config
7 Advanced Options
A1 Expand Filesystem
raspi-config を Finish で reboot

$ df -h
/dev/root        29G  1.4G   27G   5% /   が大きくなっていること
:

ホスト名・タイムゾーンの設定
$ sudo su
# raspi-config

2 Network Options
N1 Hostname
新しいホスト名を設定する

4 Localisation Options
I2 Change Time Zone
Asia -> Tokyo を選択する
後は、pi ユーザーのパスワードは変更しておきましょう。
また、IP アドレスを固定にする場合は /etc/dhcpcd.conf を修正して固定IPにしてください。
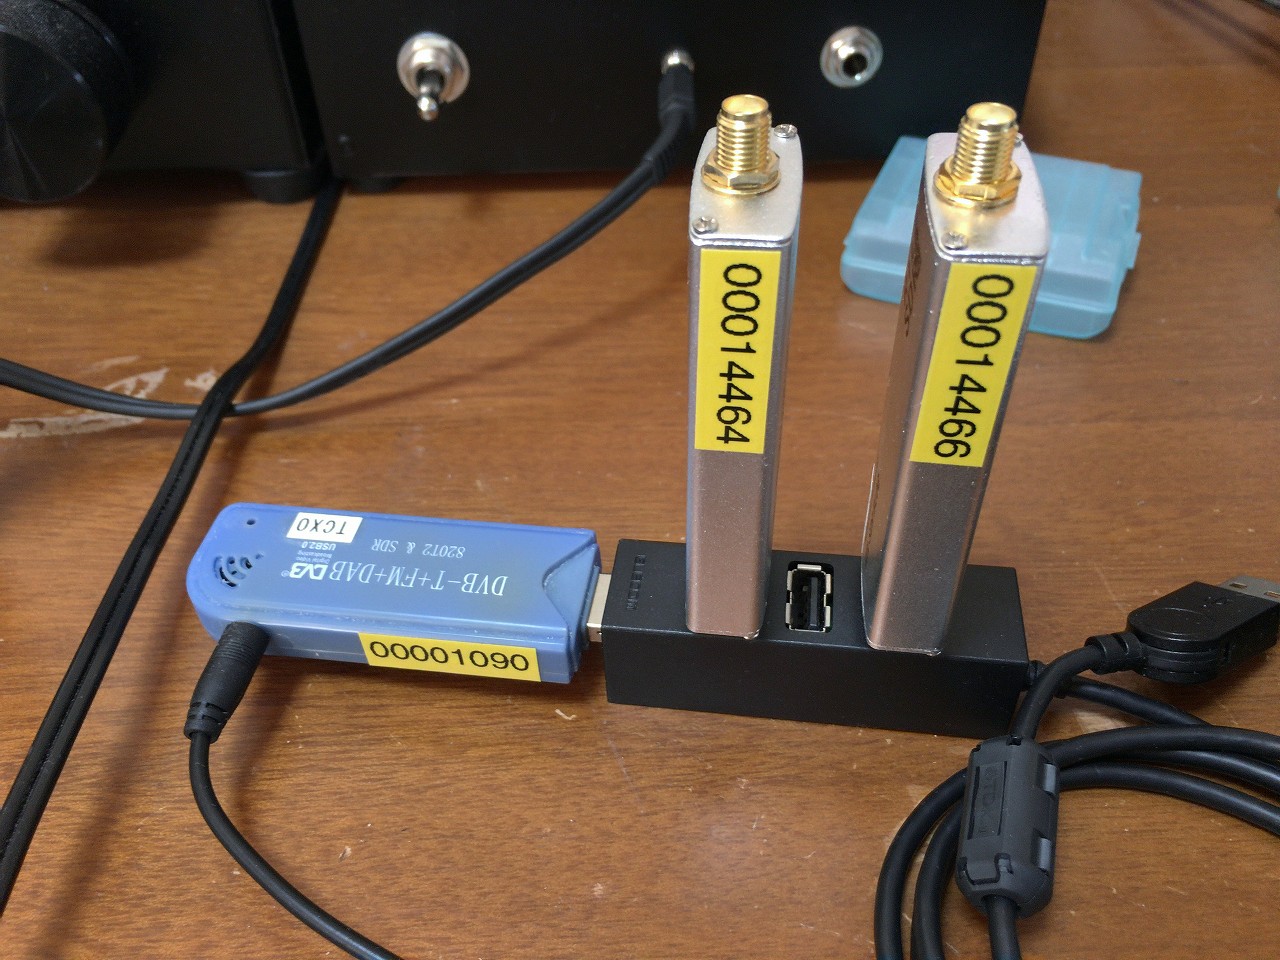
RTL-SDR USB ドングルの動作確認
次は RTL-SDR のツールをインストールして動作確認を行います。今回は、USB HUB に RTL-SDR のドングル3つ挿しています。 RTL-SDR のドングルは発熱するので写真のように離した形に設置しました。
RTL-SDR パッケージのインストール
$ sudo su
# apt-get install rtl-sdr

USB ポートに RTL-SDR を挿して USB デバイスとして認識されるか確認
# tail -f /var/log/syslog

USBデバイス認識のメッセージが出力される。

CTRL-C で tail コマンド終了

# rtl-eeprom -d 0
root@pi4-aprs:/home/pi# rtl_eeprom
Found 3 device(s):
  0:  Generic RTL2832U OEM
  1:  Generic RTL2832U OEM
  2:  Generic RTL2832U OEM

Using device 0: Generic RTL2832U OEM
Detached kernel driver
Found Rafael Micro R820T tuner

Current configuration:
__________________________________________
Vendor ID:              0x0bda
Product ID:             0x2838
Manufacturer:           Realtek
Product:                RTL2838UHIDIR
Serial number:          00001090
Serial number enabled:  yes
IR endpoint enabled:    yes
Remote wakeup enabled:  no
__________________________________________
Reattached kernel driver

Found n device(s) の表示にドングルの数だけ表示されたらOK。今回は3つ挿したので3行表示されています。
RTL-SDR ドングルのシリアル番号書き換えをします。複数のドングルを使用する場合に便利です。
pi@pi4-aprs:~ $ rtl_eeprom -d 0 -s 00001091
Found 3 device(s):
  0:  Generic RTL2832U OEM
  1:  Generic RTL2832U OEM
  2:  Generic RTL2832U OEM

Using device 0: Generic RTL2832U OEM
Detached kernel driver
Found Rafael Micro R820T tuner

Current configuration:
__________________________________________
Vendor ID:              0x0bda
Product ID:             0x2838
Manufacturer:           Realtek
Product:                RTL2838UHIDIR
Serial number:          00001090
Serial number enabled:  yes
IR endpoint enabled:    yes
Remote wakeup enabled:  no
__________________________________________

New configuration:
__________________________________________
Vendor ID:              0x0bda
Product ID:             0x2838
Manufacturer:           Realtek
Product:                RTL2838UHIDIR
Serial number:          00001091
Serial number enabled:  yes
IR endpoint enabled:    yes
Remote wakeup enabled:  no
__________________________________________
Write new configuration to device [y/n]?
rtl_eeprom -d 0 -s 8桁の数字
で書き換えできます。-d は デバイス番号というので、システムの何番目で認識されたかの番号です。ただ、ドングルの場所を変えたりするとデバイス番号は変わる可能性があるためシリアル番号で認識させるため重要なのです。私の場合は、上の写真にあるテプラの番号にしています。
Windows PC でドングルのシリアル番号を書き換える場合は https://www.rtl-sdr.com/tag/rtltool/ からツールをダウンロードして書き換えをしてください。
SDR ラジオのソフトから RTL-SDR ドングルの接続確認をします。今回は WIndows の SDR# で接続して FM ラジオが聞けることで確認しました。
$ rtl_tcp -d 00014464 -a 0.0.0.0 -p 1234
Found 3 device(s):
  0:  Realtek, RTL2838UHIDIR, SN: 00001090
  1:  Realtek, RTL2838UHIDIR, SN: 00014464
  2:  Realtek, RTL2838UHIDIR, SN: 00014466

Using device 1: Generic RTL2832U OEM
Detached kernel driver
Found Rafael Micro R820T tuner
[R82XX] PLL not locked!
Tuned to 100000000 Hz.
listening...
Use the device argument 'rtl_tcp=0.0.0.0:1234' in OsmoSDR (gr-osmosdr) source
to receive samples in GRC and control rtl_tcp parameters (frequency, gain, ...).
rtl_tcp コマンドの -d オプションでドングルのシリアル番号を指定します。これでどのドングルを使用するか決められます。
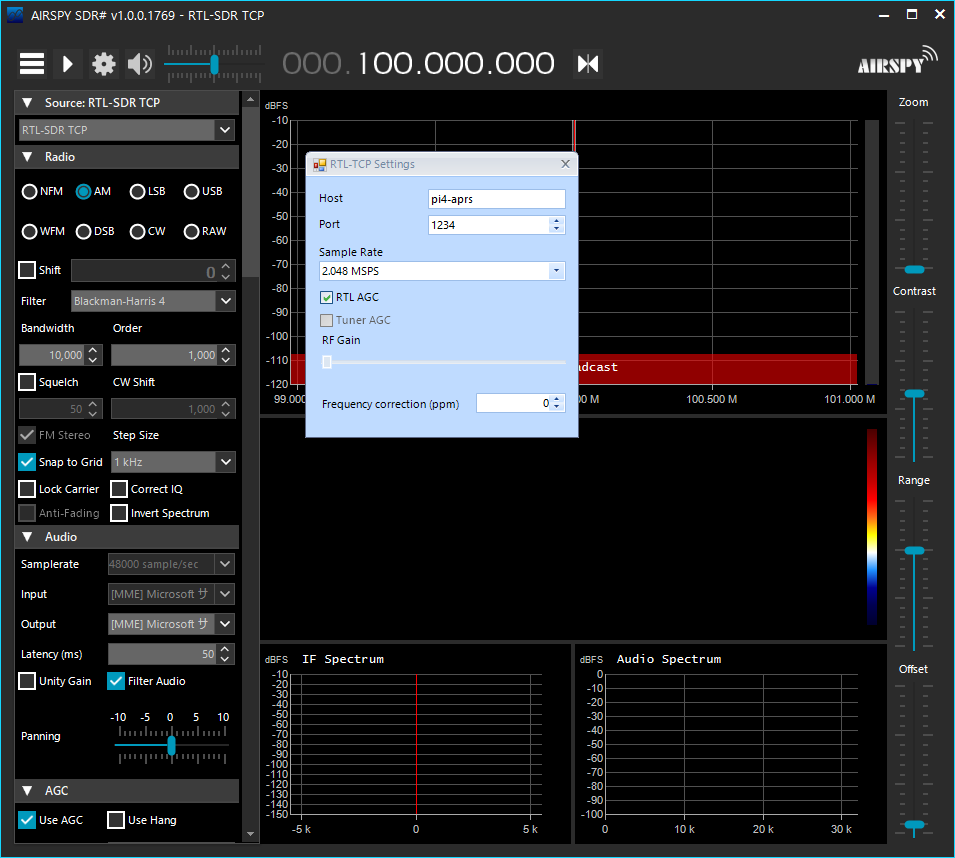

SDR# では、ラジオの種類をリストボックスにある RTL-SDR TCP を選びます。上の歯車アイコンを押して、ラズパイのアドレスとポート番号を設定。接続て地元の FM 放送の周波数に合わせてラジオが聞こえたら接続確認は OK となります。
dump1090-fa のインストール
flightaware の https://ja.flightaware.com/adsb/piaware/install のインストール手順を実施しますが、まず ADS-B の受信ができるか確認したいので、dump1090-fa というのだけインストールします。
apt に FlightAware のロケーションを追加

$ sudo su
# wget https://ja.flightaware.com/adsb/piaware/files/packages/pool/piaware/p/piaware-support/piaware-repository_4.0_all.deb
# dpkg -i piaware-repository_4.0_all.deb
# apt-get update
# apt-get install dump1090-fa
# dump1090-fa configuration
# This is sourced by /usr/share/dump1090-fa/start-dump1090-fa as a
# shellscript fragment.
# If you are using a PiAware sdcard image, this config file is regenerated
# on boot based on the contents of piaware-config.txt; any changes made to this
# file will be lost.
# dump1090-fa won't automatically start unless ENABLED=yes
ENABLED=yes
RECEIVER_OPTIONS="--device-index 0 --gain -10 --ppm 0"
DECODER_OPTIONS="--max-range 360 --fix"
NET_OPTIONS="--net --net-heartbeat 60 --net-ro-size 1300 --net-ro-interval 0.2 --net-ri-port 0 --net-ro-port 30002 --net-sbs-port 30003 --net-bi-port 30004,30104 --net-bo-port 30005"
JSON_OPTIONS="--json-location-accuracy 1"/etc/default/dump1090-fa の設定ファイルを修正します。
RECEIVER_OPTIONS=”–device-index 0 –gain -10 –ppm 0″
RECEIVER_OPTIONS=”–device-index 00001090 –gain -10 –ppm 0″
device-index を RTL-SDR ドングルのシリアル番号に修正して Raspberry Pi をリブートします。サービスの再起動でもかまいません。
Virtual Radar のインストール
https://www.virtualradarserver.co.uk/Default.aspx Virtual Radar Server サイトからアプリをダウンロードしてインストールします。
Virtual Radar アプリの Tools -> option からラズパイのデータを見るよう設定します。
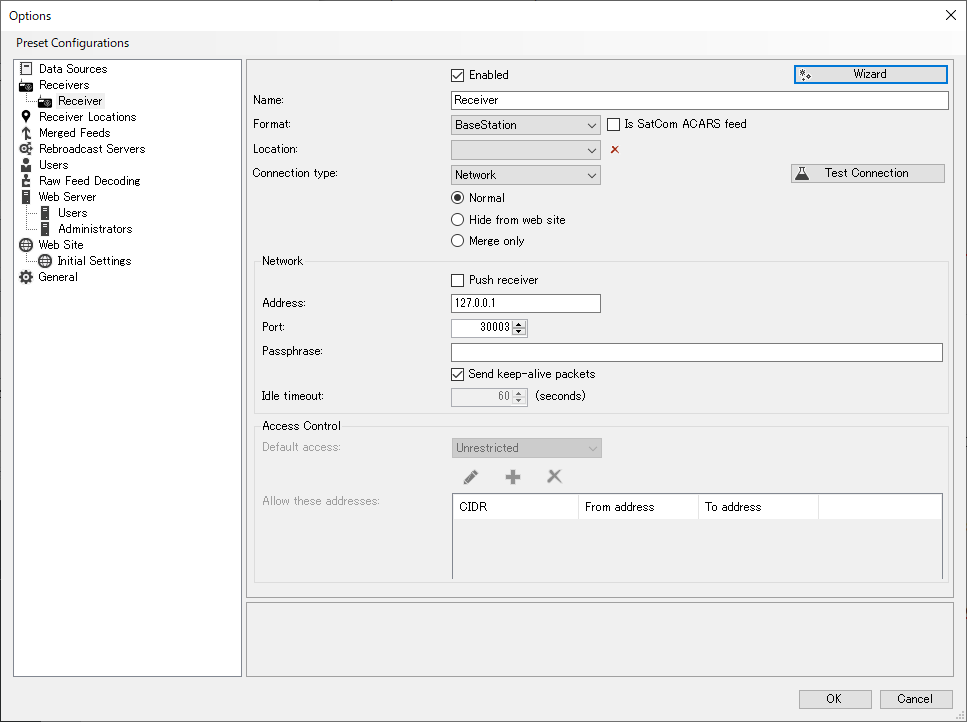
右上の Wizard ボタンを押して設定開始する
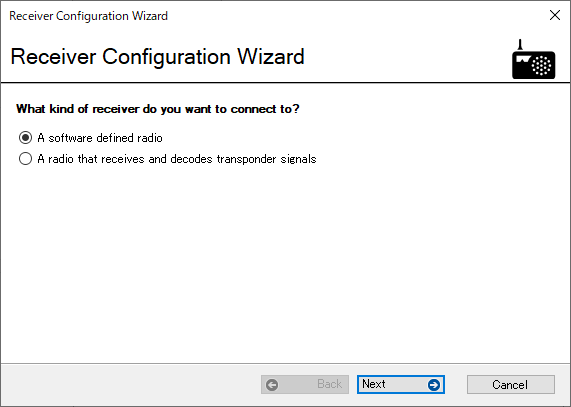
A software defined radio を選択

Dump1090 を選択

ADS-B はラズパイで動いているので No を選択
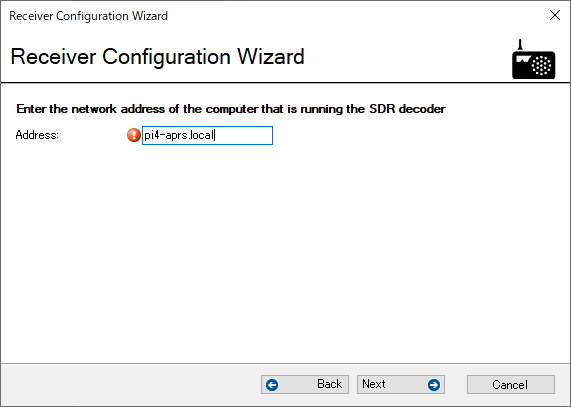
ラズパイのアドレスを入力
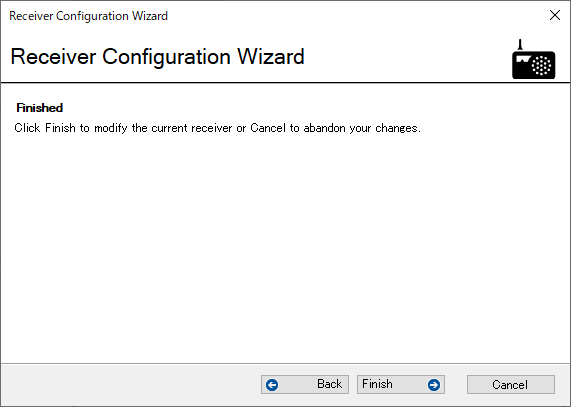
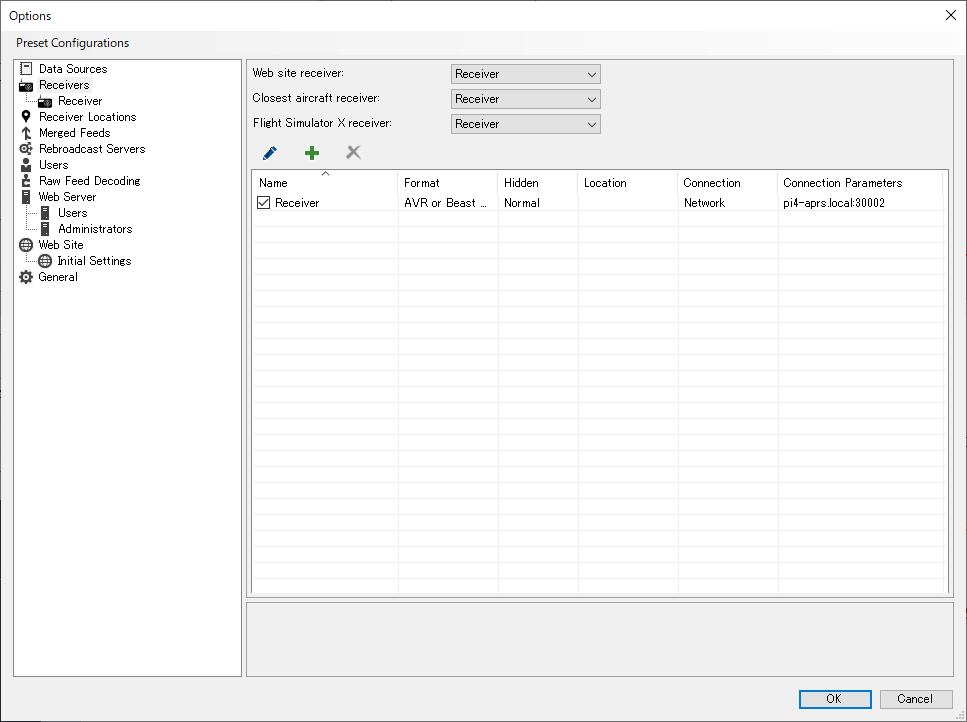
設定ウィザードが終了して、option に戻ったら、Receivers の項目が上のスクショみたいに ! マーク無いことを確認。
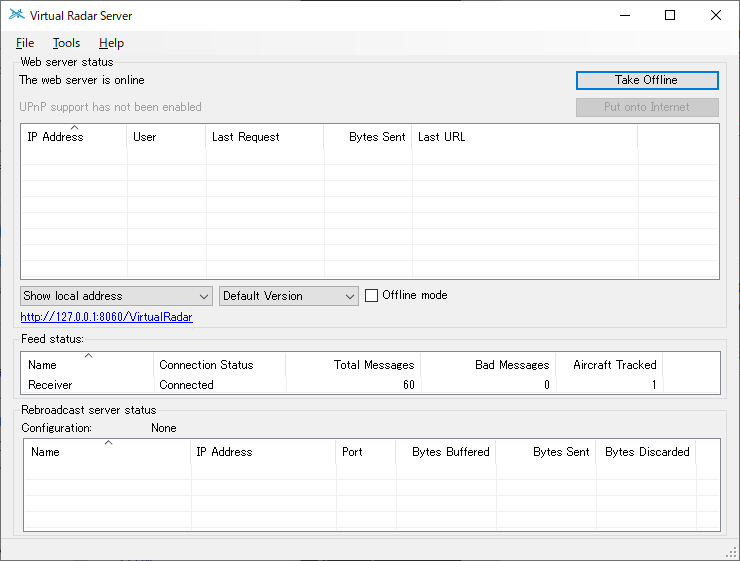
メイン画面に戻って、真ん中にある http://127.0.0.1/VirtualRadar のリンクをクリックすると Web ブラウザが開きます。
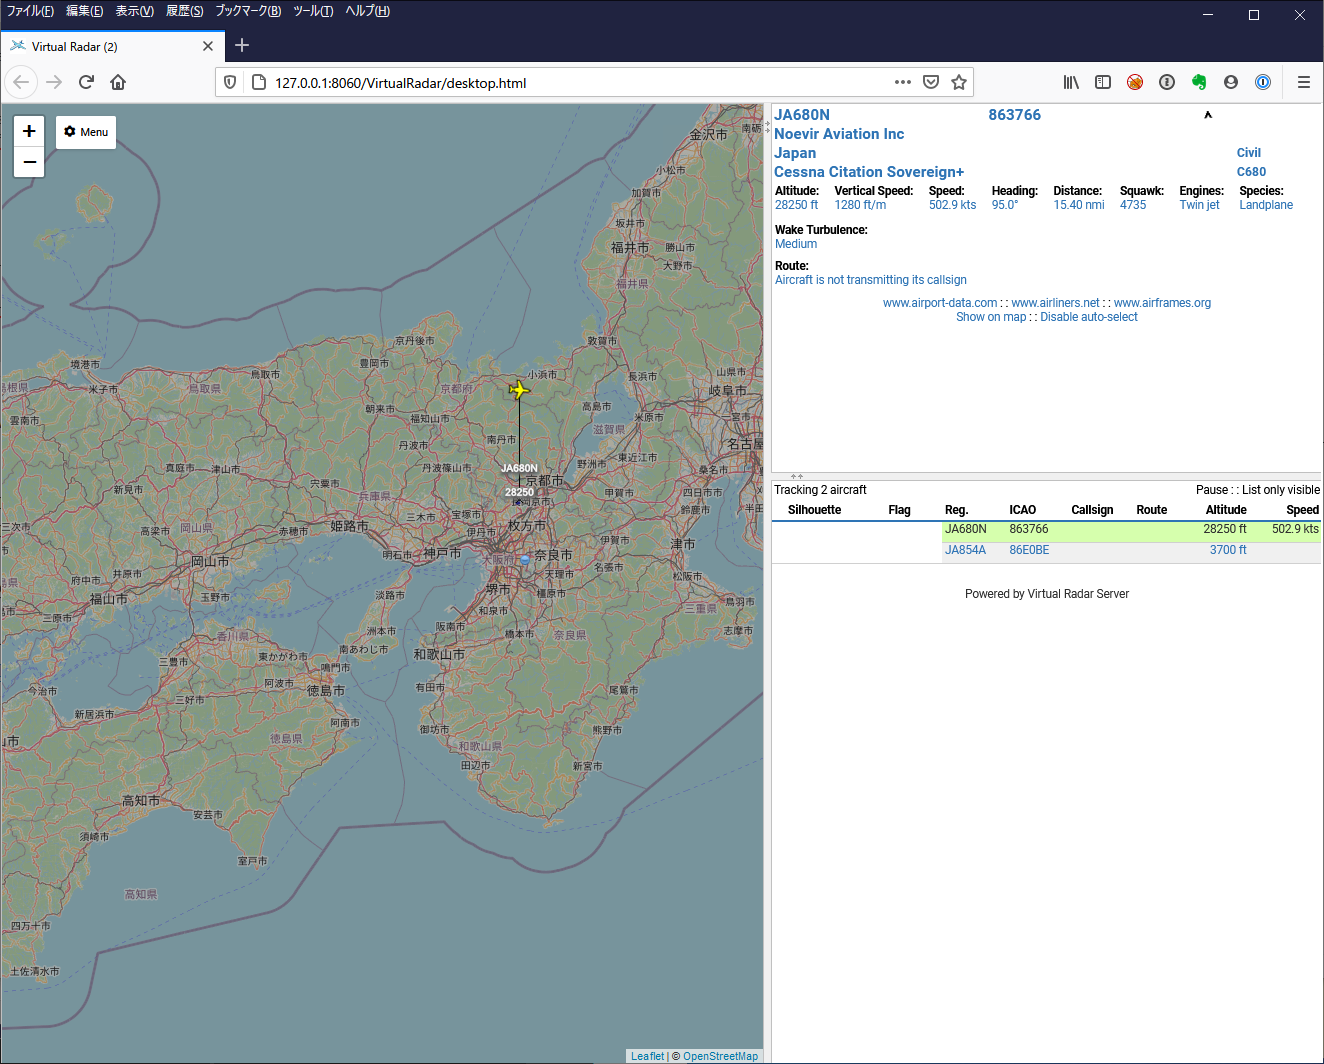
飛行機からの ADS-B 信号が受信出来ればブラウザに飛行機のデータやアイコンが表示されます。ここまで表示されれば DUMP1090 は動いています。
piaware のインストール
piaware は先の手順で dump1090 を入れていますので 追加で piaware をインストールします。dump978-fa はよくわからないのでインストールはしません。
$ sudo su
# apt-get install piaware
# piaware-config allow-auto-updates yes
# piaware-config allow-manual-updates yes
piaware のパッケージは特に質問など無くインストールされます。設定は FlightAware の web サイトからアカウントと piaware を関連付けして完了となります。
FlightRadar24 feeder のインストール
$ sudo bash -c "$(wget -O - https://repo-feed.flightradar24.com/install_fr24_rpi.sh)"を実行することで、自動的に fr24feed パッケージのインストールが実行されます。
Preparing to unpack .../fr24feed_1.0.26-9_armhf.deb ...
Unpacking fr24feed (1.0.26-9) ...
Setting up fr24feed (1.0.26-9) ...
You don't seem to have any dump1090 installed. On the fr24feed start it will automatically install dump1090-mutability.
Created symlink /etc/systemd/system/multi-user.target.wants/fr24feed.service → /etc/systemd/system/fr24feed.service.
error | Local time: 2020-10-24 15:15:25 +0900
error | GMT+0 time: 2020-10-24 06:15:25 +0900
error | Your machine should be set as GMT+0 time zone!
warning | Time zone is not set to GMT+0
______  _  _         _      _                    _              _____    ___
|  ___|| |(_)       | |    | |                  | |            / __  \  /   |
| |_   | | _   __ _ | |__  | |_  _ __  __ _   __| |  __ _  _ __`' / /' / /| |
|  _|  | || | / _` || '_ \ | __|| '__|/ _` | / _` | / _` || '__| / /  / /_| |
| |    | || || (_| || | | || |_ | |  | (_| || (_| || (_| || |  ./ /___\___  |
\_|    |_||_| \__, ||_| |_| \__||_|   \__,_| \__,_| \__,_||_|  \_____/    |_/
               __/ |
              |___/
[main][i]FR24 Feeder/Decoder
[main][i]Version: 1.0.26-9/generic
[main][i]Built on Oct 14 2020 07:35:30 (HEAD-de0814c.git/Linux/static_armel)
[main][i]Running on: raspbian10
[main][i]Local IP(s): 192.168.24.90,240b:250:5160:2c00:41de:8104:26d0:4ae0,fe80::d6c4:2cbe:dcda:95ab
[main][i]Copyright 2012-2020 Flightradar24 AB
[main][i]https://www.flightradar24.com
[main][i]DNS mode: PING

Welcome to the FR24 Decoder/Feeder sign up wizard!

Before you continue please make sure that:

 1 - Your ADS-B receiver is connected to this computer or is accessible over network
 2 - You know your antenna's latitude/longitude up to 4 decimal points and the altitude in feet
 3 - You have a working email address that will be used to contact you
 4 - fr24feed service is stopped. If not, please run: sudo systemctl stop fr24feed

To terminate - press Ctrl+C at any point


Step 1.1 - Enter your email address (username@domain.tld)
$: flightRadar 24 アカウントのメールアドレスを入れる

Step 1.2 - If you used to feed FR24 with ADS-B data before, enter your sharing key.
If you don't remember your sharing key, you can find it in your account on the website under "My data sharing".
https://www.flightradar24.com/account/data-sharing

Otherwise leave this field empty and continue.
$:データシェアリングキーを入れる。(メールで届くキーを入れる)

Verifying sharing key...OK


Step 1.3 - Would you like to participate in MLAT calculations? (yes/no)$:yes

IMPORTANT: For MLAT calculations the antenna's location should be entered very precise!

Step 3.A - Enter antenna's latitude (DD.DDDD)
$:緯度を小数点4桁で入力

Step 3.B - Enter antenna's longitude (DDD.DDDD)
$:経度を小数点4桁で入力

Step 3.C - Enter antenna's altitude above the sea level (in feet)
$:アンテナの高さを入力

Using latitude: 34.6566, longitude: 135.6465, altitude: 10ft above sea level

We have detected that you already have a dump1090 instance running. We can therefore automatically configure the FR24 feeder to use existing receiver configuration, or you can manually configure all the parameters.

Would you like to use autoconfig (*yes*/no)$:yes    を入力

Step 6 - Please select desired logfile mode:
 0 -  Disabled
 1 -  48 hour, 24h rotation
 2 -  72 hour, 24h rotation
Select logfile mode (0-2)$:1   お好みで設定する

Saving settings to /etc/fr24feed.ini...OK
Settings saved, please run "sudo systemctl restart fr24feed" to use new configuration.
Installation and configuration completed!

サービスを再起動する
pi@pi4-aprs:~ $ sudo systemctl restart fr24feed
FlightRadar 24 のデータシェアリングは、キー番号で一意となるため、fr24 のサイトにログインして、My Data Sharering を見てONLINE となっていれば問題ありません。
aprs 受信用 direwolf の起動
aprs 運用には何種類かパッケージがありますが今回は direwolf を使用しました。
sudo apt-get install direwolf screengithub は 1.5 ですが、パッケージを入れた場合 1.4 が導入されます。受信するだけなので 1.4 のままでいきます。
9600bps 起動のコマンドライン
$ rtl_fm -d 00014466 -M fm -f 144.66M -s 24000 - | direwolf -t 0 -c sdr14466.conf -r 24000 -D 1 -B 1200 -1200bps 起動のコマンドライン
$ rtl_fm -d 00014464 -M fm -f 144.64M -s 48000 - | direwolf -t 0 -c sdr14464.conf -r 48000 -D 1 -B 9600 -9600configファイルは以下のような内容。コールサインはご自身のコールサインに修正してください
ADEVICE null null
CHANNEL 0
MYCALL JP3SRS-10

IGSERVER japan.aprs2.net

IGLOGIN JP3SRS-10 5桁のパスコード

OBEACON sendto=IG DELAY=0:00 EVERY=30:00 OBJNAME=JP3SRS-10 SYMBOL=\& overlay=R lat=緯度 long=経度 comment="RX-Only I-Gate 144.64M 9k6 144.66M 1k2"
1200configファイルは以下のような内容。コールサインはご自身のコールサインに修正してください。config の中身は一緒ですが、direwolf を2つ起動するとポート番号重複エラーメッセージが表示されます。それの回避でポート番号設定の行が増えています。
ADEVICE null null
CHANNEL 0
MYCALL JP3SRS-10
AGWPORT 8002
KISSPORT 8003
IGSERVER japan.aprs2.net

IGLOGIN JP3SRS-10 5桁のパスコード

OBEACON sendto=IG DELAY=0:00 EVERY=30:00 OBJNAME=JP3SRS-10 SYMBOL=\& overlay=R lat=緯度 long=経度 comment="RX-Only I-Gate 144.64M 9k6 144.66M 1k2"